|
Listen to this article
|
If you are applying for a Canada PR or a visa, you would need to upload your passport size digital photo.
Many applicants face delays because their photos do not meet Canadian IRCC standards.
Here’s a simple, step-by-step guide to help you get your photos right the first time as per Canada photo guidelines for Visa or Permanent residency.
Official Canada Photo Requirements
To avoid delays and rejections, your application photos must strictly follow the official Canada government photo specifications.
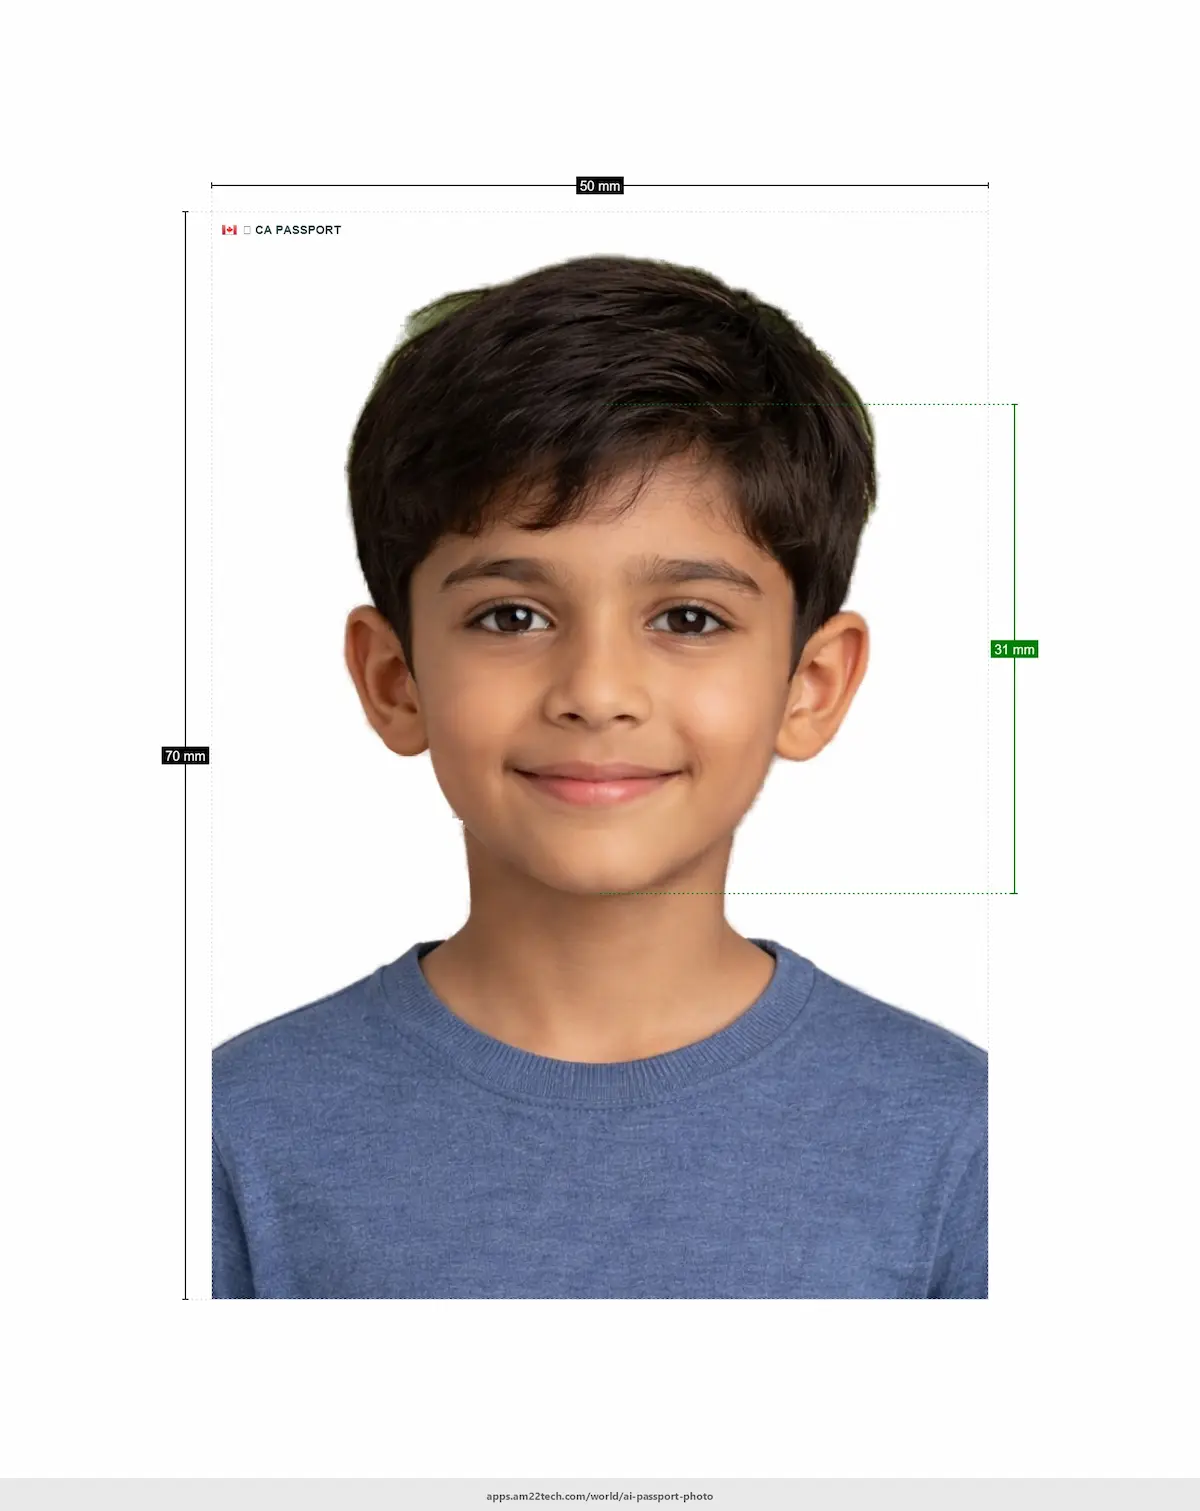
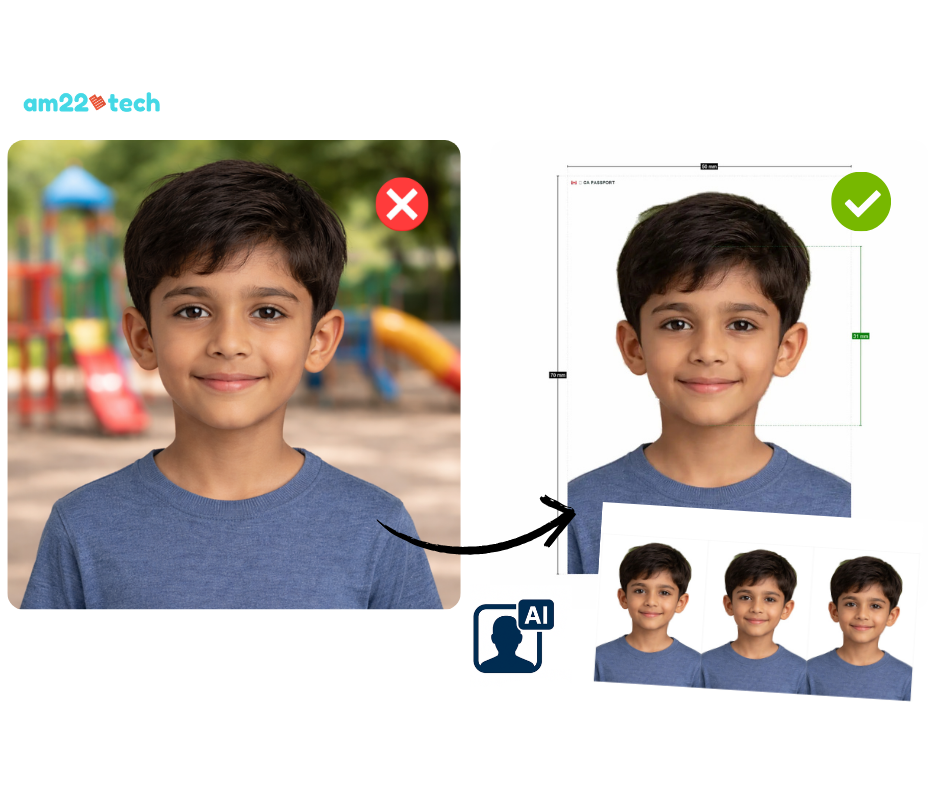
- Size: 2 inch width x 2-3/4 inches height (50mm x 70mm)
- Head Position: Head height must be between 1-1/4 inch and 1-7/14 inches (31–36 mm) from the bottom of the chin to the top of the hair.
- Background: A plain white or off-white background is required, with no patterns or shadows.
- Expression: Maintain a neutral facial expression or a natural, subtle smile. Both eyes must be open and visible.
- Eyewear: Glasses are not permitted in the photo, except in rare instances of medical necessity with a signed doctor’s statement.
- Print Quality: Photos must be high-resolution, printed on photo-quality paper (matte or glossy), and free of smudges or creases.
- Digital Size:Between 715×1000 and 2000×2800 pixels in JPEG or PNG format; file size must 4MB or less
Where to Get photo Clicked In USA?
You can visit Walmart, CVS or Walgreens to get your photos clicked.
At some locations, even Costco and Sams club also offer reasonably proceed passport size photos. They can also edit the photo as per USCIS requirements.
They usually charge upwards of $14.99 for two pictures.
The other option is to click the photo yourself using the mobile phone camera or your digital camera. There are softwares and websites available online which can help you edit your photos to exact specifications.
You should remember that editing is complex as the final edited image should print to exact measurements of 2 inch x 2-3/4 inch on paper. The image’s DPI (dots per inch) also matter as they control the quality of the final printed output.
USCIS requires the image to be high resolution which can be attained if you click the image by your iPhone and then edit it to at least 300 DPI. AM22Tech’s AI photo editor takes care of checking the photo resolution and edits it to minimum 300 Dots per inch thereby making it extremely easy to satisfy government requirements.
If you would like to click them yourself to save money, here is how to take photo at home.
How to Take Your Passport or Visa Photo at Home
Save time and money by capturing a professional-quality photo right from home. All you need is a smartphone and a few minutes. Follow these steps for the perfect shot.
1 Right Lighting
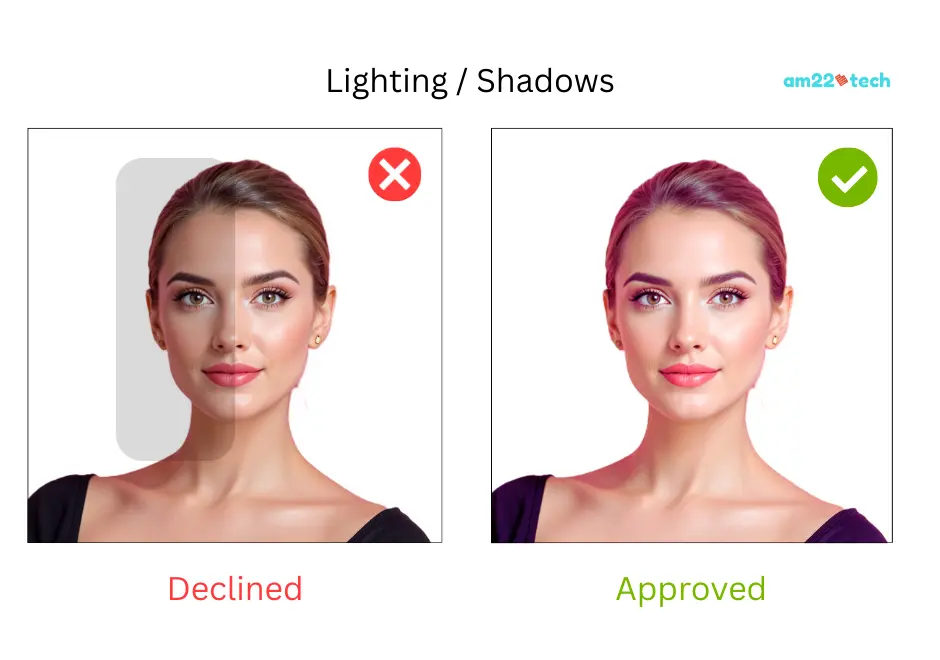
Stand against a plain white or off-white wall. Face a window for natural daylight to ensure even lighting and avoid harsh shadows.
2 Set Up Your Camera
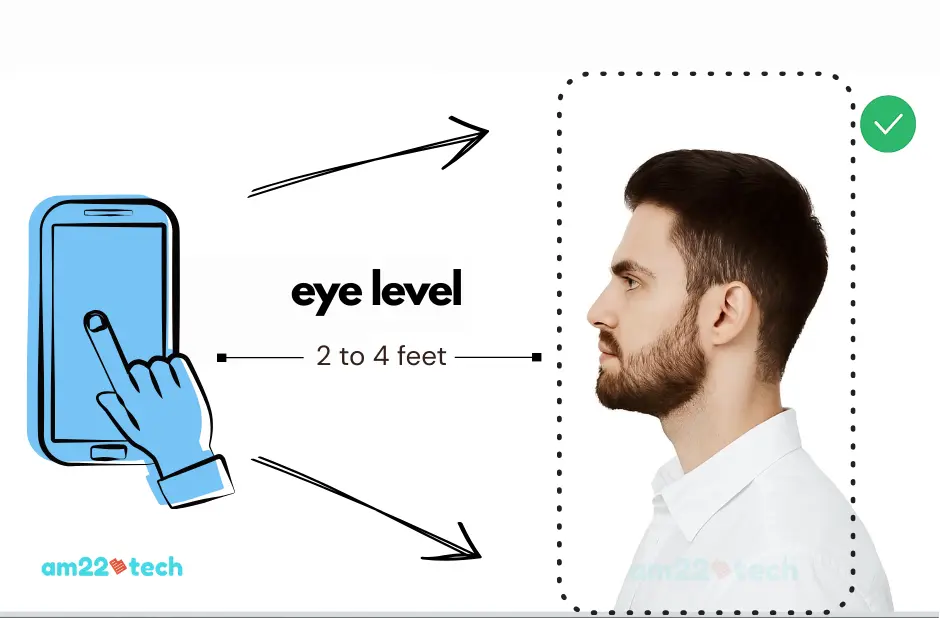
Use a tripod or ask a friend. Keep the lens at eye level and about 2 to 4 feet away. Always use the back camera for sharper quality.
3 Strike the Correct Pose
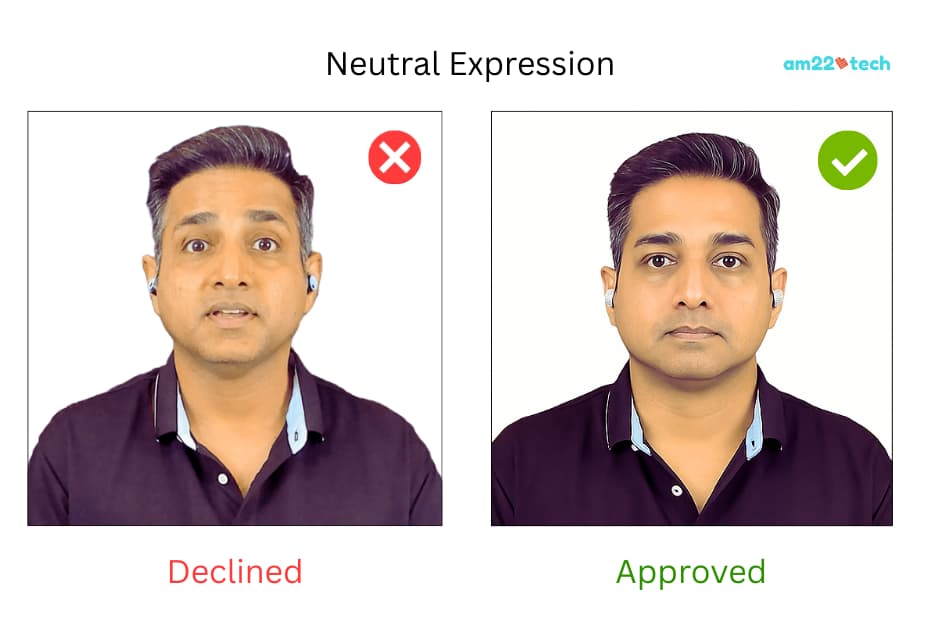
Look directly at the camera with a neutral expression. Keep your head straight, shoulders relaxed, and ensure your full head and shoulders are visible.
4 Capture & Upload
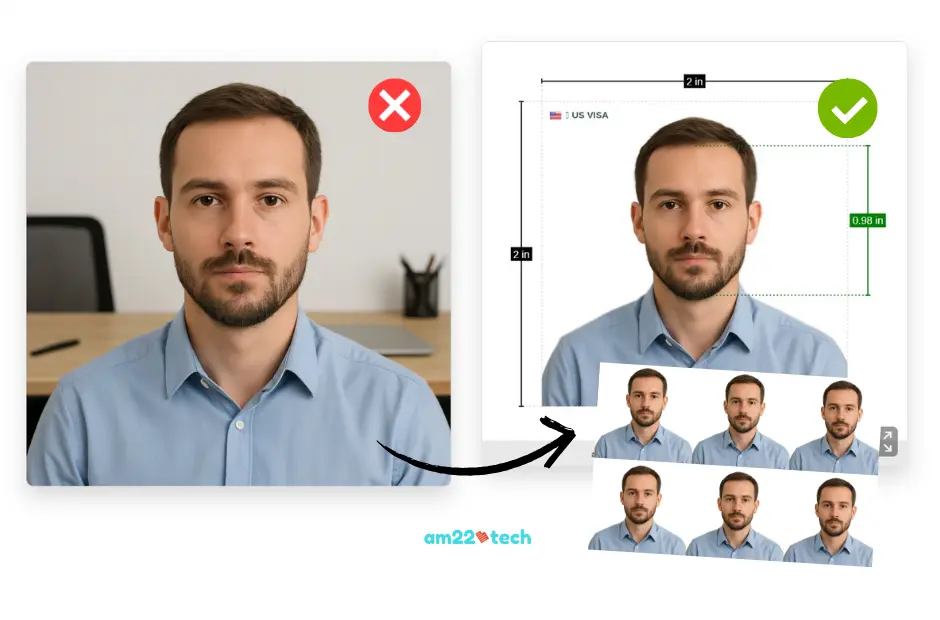
Take the shot and upload it to an AI photo editor. It will adjust background, crop correctly, and produce a high-resolution photo that matches government standards.
Expert Tip
Avoid using a flash. It creates glare on skin and glasses. Natural light is your best friend!
FAQ
No, the photo size requirements are different for US visa and Canada PR/Visa.
Canada requires the photo to be 2 inch x 2-3/4 inch in size when printed on paper.
If you are uploading the file digital photo online on Canadian website, the photo should still be 2x2-3/4 inch when they print on paper.
The size requirements are mandatory.
Yes. Even subtle tilts or angles can trigger a delay—even if the photo initially "validated" online.
Ensure your face is straight, both ears are visible and eyes are fully facing the camera.
Yes— we strongly recommend to click photos in color.